Welcome to our Craft Blog Hop! We’re excited to share a few projects with you today on our hop that – depending on what you have on hand – can be made from materials you have at home.
Before we get started, I’d like to introduce you to everyone sharing a creative project on today’s hop:
- Jen Frost (that’s me!) at Faith and Fabric: Quilt a Double Sided Lent/Easter Table Runner
- Amy Millsap at Created Beloved: Making a “Let’s Chew on This” Jar
- Elaine Luther of Elaine Luther Art: Make Origami Window Stars
- Lisa Ruble of Love to Color My World: Making Woven Mini Rugs with Fabric Scraps
- Monica McConkey of Arma Dei: Making a Good Deed Bracelet
I encourage you to check out their creative projects – I know I’ll be doing the same!
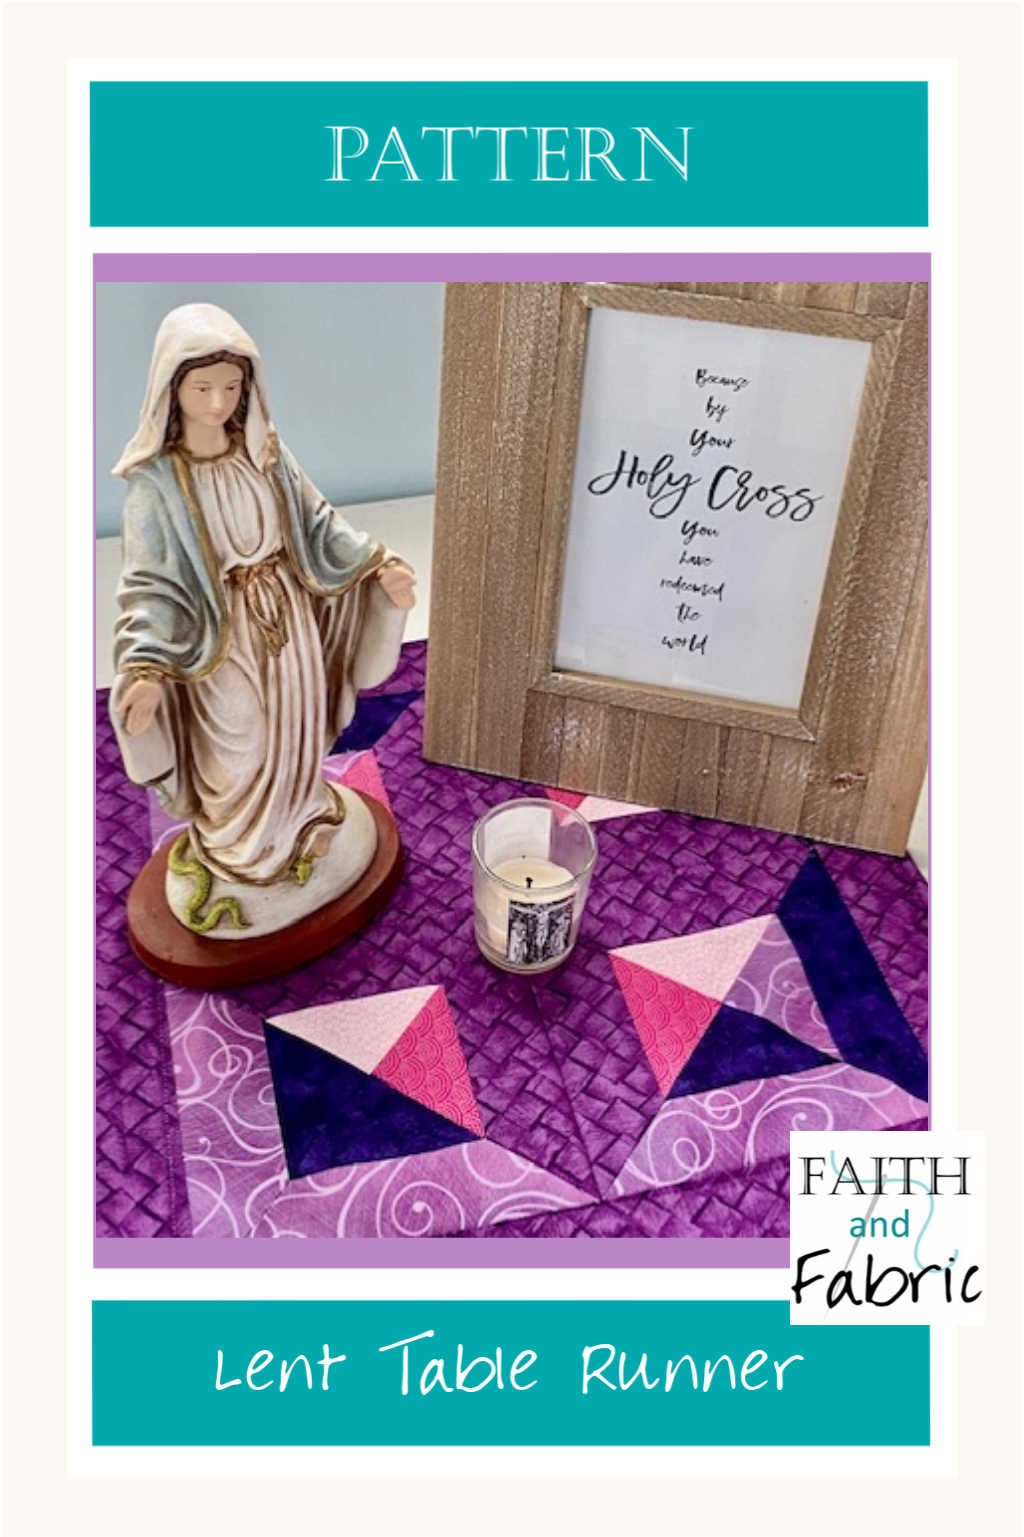
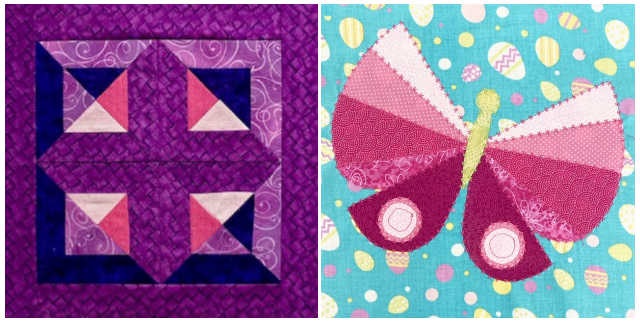
Onto the quilt – are you ready to sew? Today we’re going to make a six-block reversible Lent Table Runner. This is created from a single block that rotates 180-degrees, making an interesting pattern of the light and dark purples. I like this block for Lent, as the center of the block has a subtle cross inside it, with the lighter pink (representing the third week of Lent) radiating from behind it.
You can use a solid piece of Easter print fabric to back this quilt top. What makes this extra special is that it’s then reversible; come Easter day, just flip it over and your decorating (at least on your table) is done! If you enjoy this project, I invite you to check out our other table runners, like our Advent Table Runner – or even our larger Lent quilt, which comes in three different sizes.
If you want to add some easy strip piecing to the back of this quilt to lengthen, check out this video on a quick way to easily cut 2.5″ strips from your remaining fabric scraps:
WHAT YOU NEED:
- sewing machine
- iron
- fabric sheers
- fabric pins
- chalk and graphite fabric pencil (I swear by this one!)
- basting spray
- fabric starch
- 1/2 yard of light purple fabric
- 1/2 yard of dark purple fabric
- 5/8 yard of medium purple fabric
- 1/8 yard of light pink fabric
- 1/8 yard of medium pink fabric
- 1/2 yard of Easter fabric
HOW TO MAKE:
- First, print out the template for the Lent Table Runner. NOTE: Want a printable version of this pattern, as well as instructions on how to make a beautiful Easter butterfly back? Pick up the full pattern in our shop!
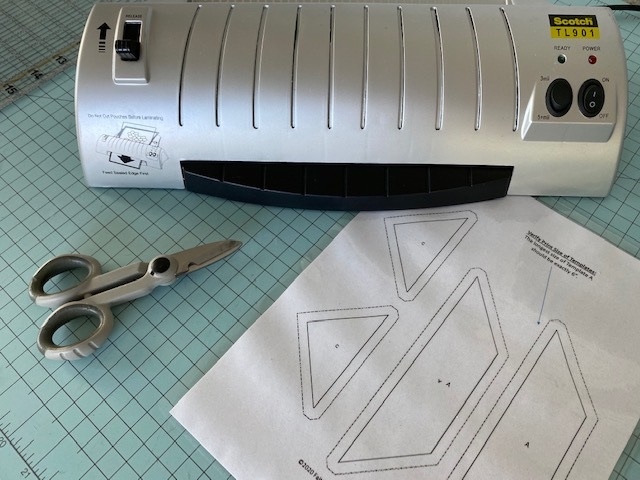
- Cut out the templates (A + C) found in the pattern. TIP: do you have a laminator? I strongly suggest you laminate your pieces, as it makes cutting so much easier! It’ll honestly change the way you quilt.
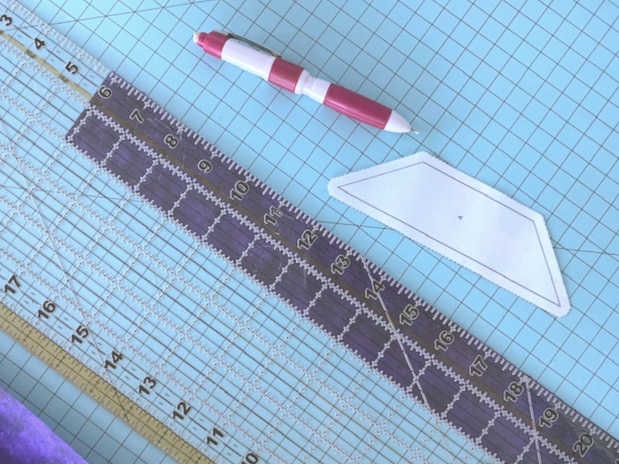
- We’ll be making this project one block at a time as opposed to all six blocks at once. Let’s start on the first block. Press your fabrics, using a fabric starch, and cut based on the table below. I *highly* recommend this fabric pencil, as it has both a chalk and graphite option – which means it works perfectly on all your fabrics, no matter how light or dark! A tip: The shape of Template A is exactly 2″ tall – so cut a 2″ strip, and then trim your pieces from that.
– four (x4) of Template A using Fabric V
– four (x4) of Template A using Fabric W
– eight (x8) of Template A using Fabric X
– four (x4) of Template C using Fabric V
– four (x4) of Template C using Fabric W
– four (x4) of Template C using Fabric Y
– four (x4) of Template C using Fabric Z
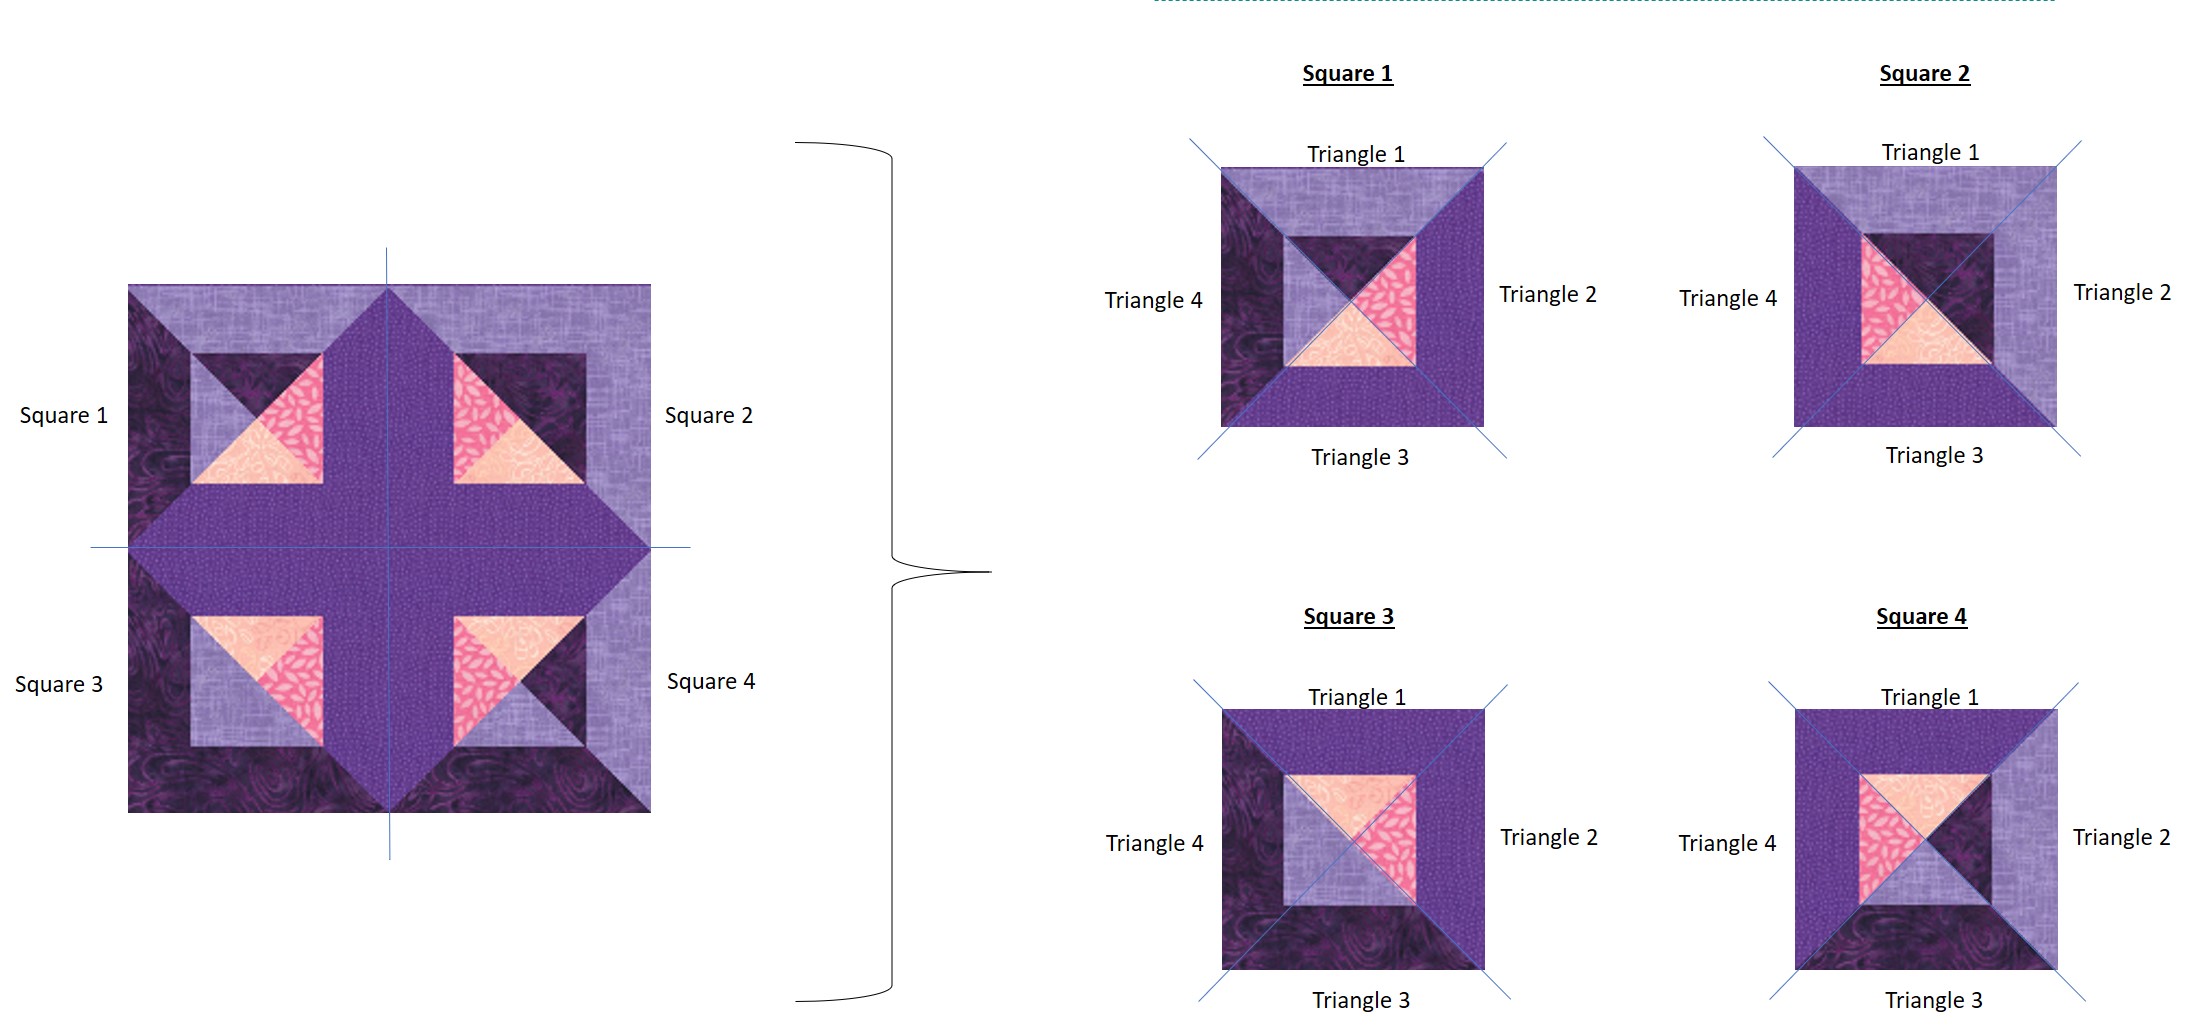
- It’s time to assemble the blocks! As shown both in the pattern and below, each 12″ quilt block is divided into four squares made of four sets of triangles.
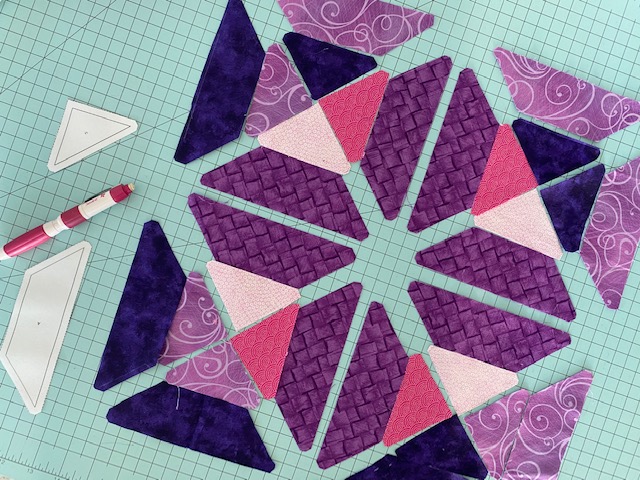
- First, lay out all your pieces on your cutting mat or design wall.
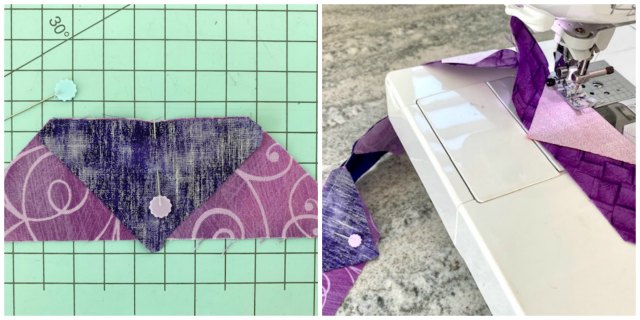
- Begin with Square 1. Assemble the top triangle (Triangle 1) by sewing Fabric W (cut from template C) to Fabric V (cut from template A). Next, sew Triangle 2 by sewing Fabric Z (cut from template C) to Fabric X (cut from template A). All seams are sewn with a 1/4″ allowance.
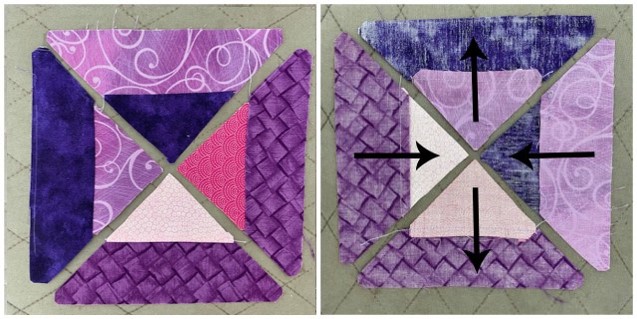
- Repeat this same process for Triangle 3 and Triangle 4. Press your even numbered triangle seams (Triangle 2 and Triangle 4) towards the small triangle, and press your odd numbered triangle seams (Triangle 1 and Triangle 3) away from the small triangle.
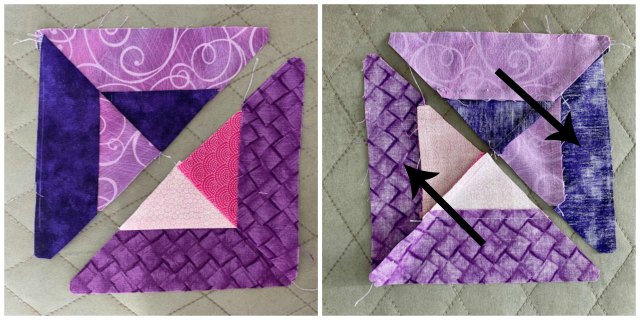
- Join triangles 1 & 4 into a single unit by placing triangle 1 on triangle 4 and “nesting” (lining up) the center seam. Your seams will nest very well because of the way you pressed them in the previous step. Sew, and repeat for the triangles 2 & 3.
- Repeat this same process for Squares 2, 3, and 4 using the coordinating colors and process above.
- Sew Square 1 and Square 2 together, pressing seams towards Square 1. Sew Square 3 and Square 4 together, pressing seams towards Square 4.
- Sew Squares 1/2 to Squares 3/4, again lining up your seams. Press final seam open.
- Repeat for remaining blocks.
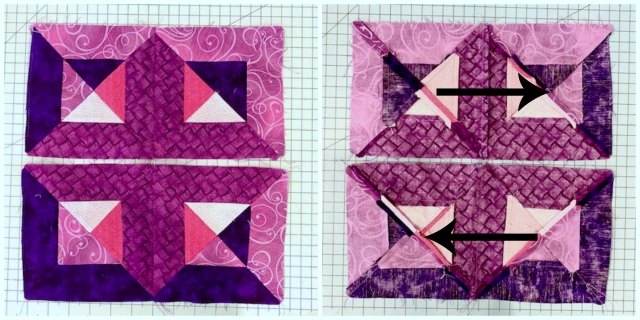
- Once you have all your blocks assembled, it’s time to sew them together. Each block is the same, yet the rotation of the blocks makes an interesting visual pattern. Sew Block 1 and Block 2 together, being sure to rotate Block 2 so it’s “upside down”. The lightest purple colors should line up and be sewn together. Repeat until all your blocks are sewn together as shown in the example above.
- Press seams open.
- If desired, add a border to your quilt top. Cut four strips from Fabric V (note that most fabrics come in a width of 40-42”, so you will need to create your 74.5” strips by piecing together multiple 1.5” strips). For demo purposes, I’ve used a single quilt block and a 2.5″ border.
– Strip A: 74.5”x1.5”
– Strip B: 12.5”x1.5”
– Strip C: 74.5”x1.5”
– Strip D: 12.5”x1.5” - Once your strips are cut, sew Strip B and Strip D to the sides of your quilt top, being sure to pin before you sew. Press seams towards the strips.
- Next, sew Strip A and C to the top and bottom of your quilt top, being sure to pin before you sew. Press seams towards the strips.
- Lastly, it’s time to quilt! Use a basting spray to secure your three layers together; spray baste your pieced Lent quilt top to the batting, and place your Easter fabric – right sides together – on top of your Lent fabrics. Sew the three layers together, leaving a five-inch gap for turning.
- Turn your fabric, press, quilt, and enjoy!

[…] Sewing is a big part of my life, so each year I put up a Lenten table runner that I made (you can make your own by following the tutorial here). Do these colors remind you of Advent? If so, you’re spot on: many of the liturgical colors of […]