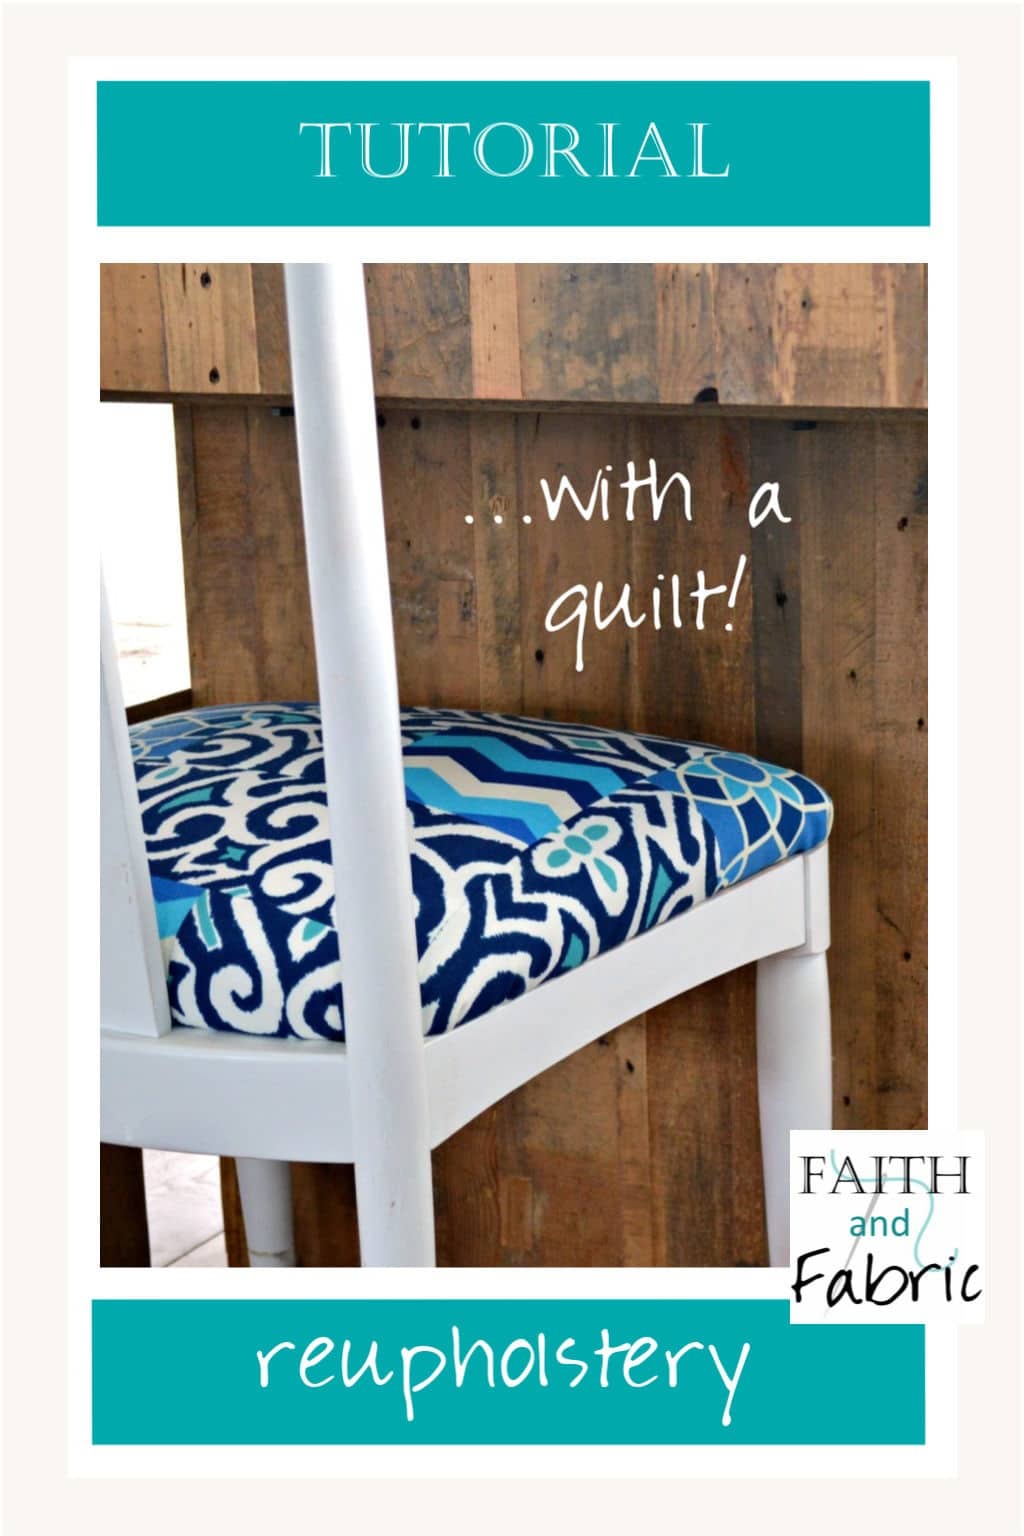
There comes a time when you may want to reupholster a chair or two in your home; our kitchen chairs have definitely seen better days. They are the original Ethan Allen chairs that came with a hand-me-down table, and – though the frames are in excellent shape – the cushions are sinking in, the board centers are missing, and the fabric shows its age.
Our home is done in blues, whites, and grays – all beach tones, as we live near the coast. Last summer I made some great outdoor pillows and had a bit of fabric left in these three prints…but all in randomly sized pieces and not enough of two of the prints to cover even one chair let alone four.
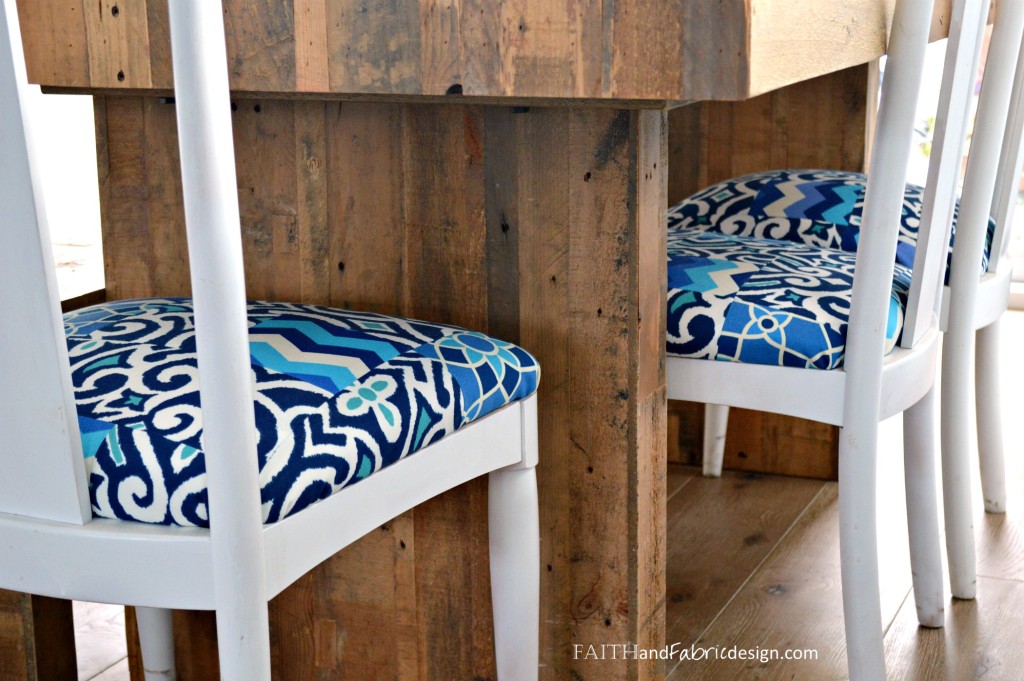
So, I got a bit creative with the fabric and made these adorable patchwork chairs – aren’t they fun? Again, I used some fabric I had on hand, but am already looking forward to the day that I can reupholster a chair (or four) again. There are some really gorgeous fabrics out there, just looking for yourself at www.fabriccarolina.com, there so many possibilities!
Here’s how:
- Remove the Old Upholstery: first, unscrew the seat unit from the chair. Be sure to place the screws from each chair into a separate baggie so each chair’s screws are in their own baggie (screws may be different across the chairs). Then, using pliers and a flat-tip screwdriver, pry the staples off the bottom of the wooden unit until you have at least three separate parts: the wooden base, the cushion/padding, and the upholstery. You may have a few additional layers in there like batting or muslin as well.
- Determine if You Need a New Seat: take a look at the wooden base. Is it cracked or sagging? If so, use it as a template to trace new wooden bases. Again, while each chair *should* be the exact same, you may want to use each seat’s wooden base as a template for that specific chair’s replacement wooden base. Once you have the bases traced out on plywood or MDF, use a jigsaw to cut and gently sand the edges.
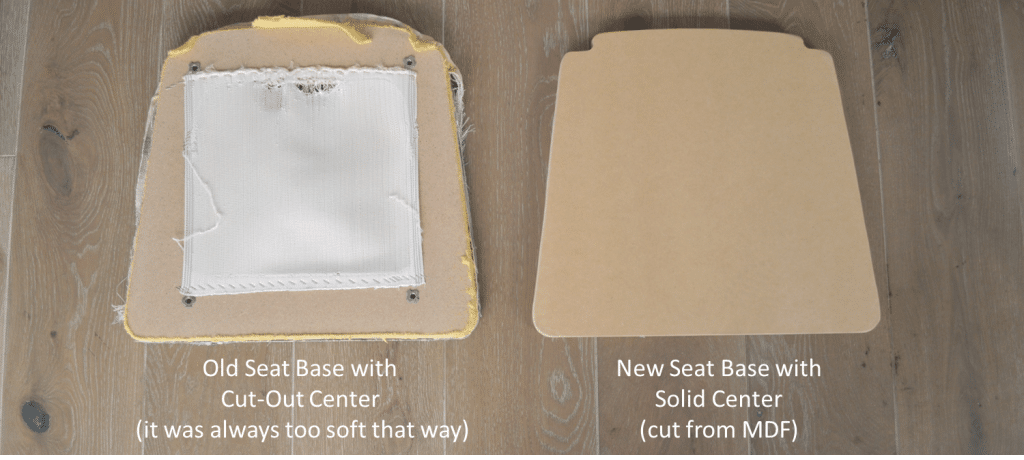
- Determine if You Need a New Cushion: take a look at the cushion/padding. Is it crushed, ripping, or flattened? If so, you’ll want to purchase new padding for your seat. Don’t skimp on savings here; a less-expensive cushion will quickly wear out. Companies like FoamTouch make padding specific for high-traffic seats like kitchen chairs. Once you purchase the padding that’s right for you, use the old padding as a template and cut out.
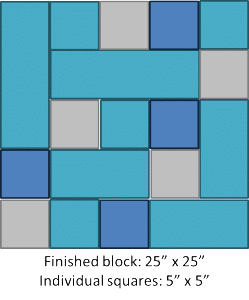
- Create the Quilt Top: You can create a quilt top for your seat in any pattern! Think of all the beautiful quilt blocks out there; use an existing pattern, or make up your own. As I wanted to use up the fabric I had on hand, I came up with the following ultra-simple pattern; it used up all of prints A and B, and is comprised mostly of print C (of which I had a lot).
- Determine Amount of Fabric: determine the size of quilt top needed by measuring the size of the wooden base + cushion and adding four inches to each side. Assuming your new depth is about two-three inches, this gives you one-two inches to secure the fabric at the base (see Step 5).
- Quilting Seat Covers: seats are subject to a bit more pulling and use than the blankets you quilt. As such, there are a few things you can do to make your quilted seat more durable:
- Select high-quality, dense, stain-resistant fabrics: I mentioned that I’m using outdoor fabric; not only is it water resistant to help with spills, but it’s very dense and will hold up for a longer period of time.
- Use a 3/8″-1/2″ allowance: give yourself a greater seam allowance. As there will be pull on the seams each time a person sits down, a wider allowance will decrease the chance that the seam will split.
- Press seams closed: if you normally press seams open, you’ll want to press them closed. Pressing them closed will also strengthen the seam, and decrease the chance of the thread breaking and seam splitting.
- Use a higher-density thread: many companies make heavy-duty thread, and if you’re using outdoor fabric, you’ll want to use an outdoor thread as well.
- If you are piecing with a lighter-weight cotton fabric *and* plan on quilting with batting and a backing, consider using a dense fabric as the quilt back. Canvas drop cloths work wonderful. The material is inexpensive, thicker, water resistant, and will add durability to the pieced fabric once the three layers (pieced top, batting, and canvas) are quilted together. Don’t forget to use a needle meant for sewing through thick fabrics.
- Note: whether you chose to fully quilt your project is up to you. In this example, we did not and just used the quilt top of outdoor fabric directly on top of the cushion.
- Reupholster the Seats:
-
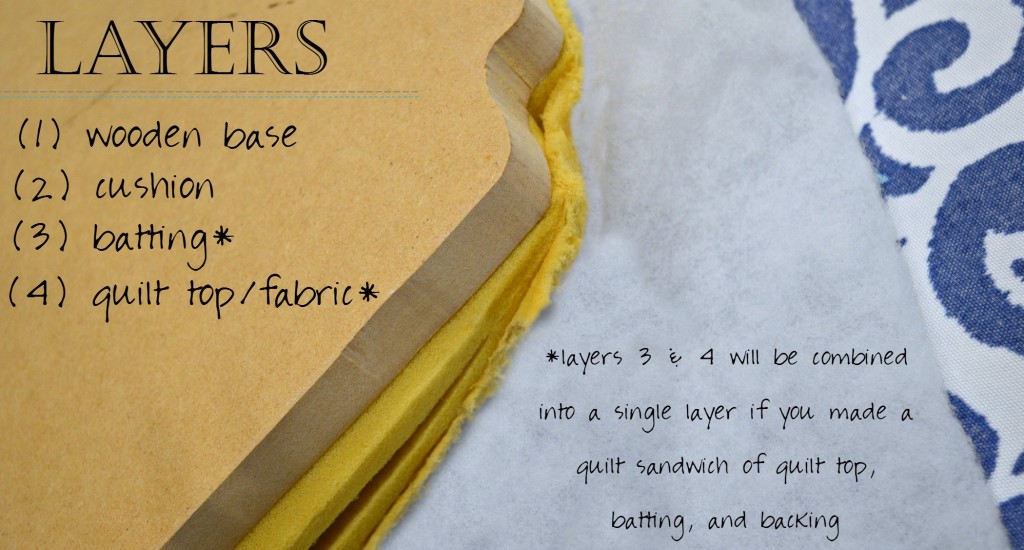
- Place the wooden seat base on a flat work space and top with the cushion. Center your quilted fabric on top of the cushion.
- Holding it in place so it doesn’t move, flip the cushion over so the fabric is right-side down and still centered on the cushion.
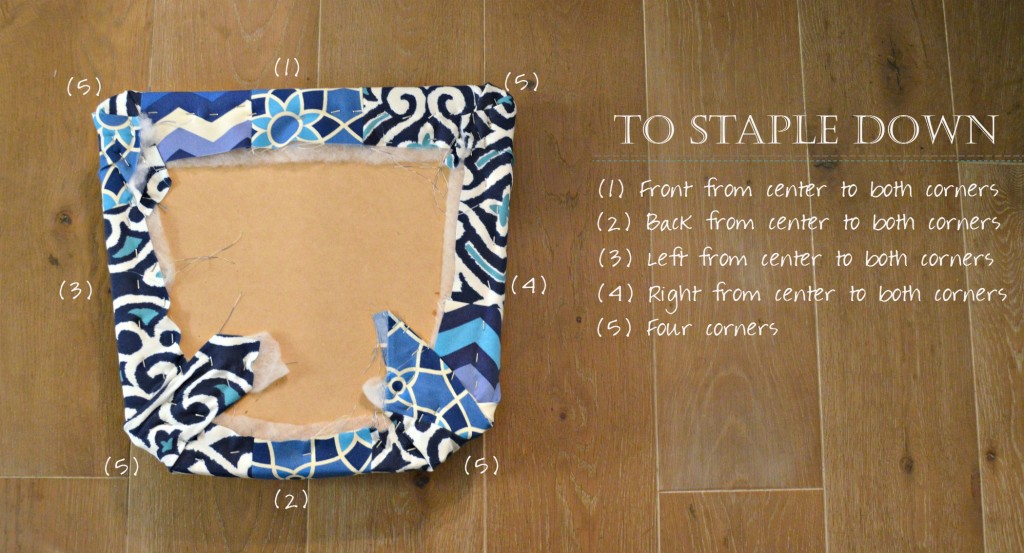
- Starting in the front center, staple the fabric to the wooden seat base by adding a staple every inch. Ensure there is a light tension on the fabric so it is snugly attached. If keeping your fabric centered or straight is important, be sure to flip over your seat every few inches of staples to ensure it hasn’t shifted and is still centered.
- Once you reach a corner, stop and go back to the original center staple. Work your way in the other direction until you reach the opposite corner.
- Once one side is stapled, repeat the process on the other three sides beginning with the side directly opposite the side you just finished.
- To make the corners, tuck the sides of the fabric under the largest piece, and pull down onto the wooden seat base. Staple in place.
- Position the reupholstered seats onto the chair frame and screw into place.
-
- Enjoy your beautiful – and unique – seats!
Love this idea? Pin the image and save it for later!
![]() Just for fun…this post links up at these great Catholic and quilting sites.
Just for fun…this post links up at these great Catholic and quilting sites.

They look great! Nice tutorial too 🙂
Thanks, Hope! I’d love to see yours if you make some, too.
Hey, Jen! Your chairs look amazing! Thanks so much for hosting! I don’t see the link up for TGIFFers?
Oh, M-R – it’s live now! I had it set to go live at 12am on Friday morning (I live in a PST time zone so it’s still Thursday here). I went ahead and published it so you should see it now.
Jen, these are beautiful! I love the way the white and blue look against the wood grains on the table.
Thanks, Lis! The contrast turned out beautiful…I agree.
Your chairs are lovely, what a great use of that leftover fabric 🙂
Thanks, Celtic Thistle – it was wonderful to use up that fabric!
Beautiful chairs and nice tutorial. Thanks for hosting TGIFF!
Thanks, Dominique, for stopping by!
These are awesome, and your tutorial is fantastic! Thanks for hosting us!
Thanks, Erin! They were fun to make.
They’re beautiful! What a great idea! I really need to reupholster our dining room chairs and I’m sure your tutorial will be very helpful in guiding me as I go.
Julie, it’s honestly as easy as it looks. That’s not true. It’s easier. Promise. Looking forward to seeing how your chairs come out!
Lovely chairs and a wonderful tutorial. Thank you for hosting today.
-Soma
Hi Soma, so glad to connect with you today. Love your work!
Beautiful fabrics. The chairs look fabulous.
Thanks, Anja – I’m thrilled, too, with how nicely the fabrics play together.
I don’t know why I’ve never thought of this! I have a Gunlocke chair from the early 1970s that needs a face lift, and it also has a sagging seat! Thanks for the tutorial.
Hi Linda – honestly, I can’t believe I didn’t think of it sooner, either 🙂 Now that it’s on my radar, every chair is being looked at differently in my home (muahahaha <--evil laugh. ha!)
Hi Jen, I read your post last Friday when I added my finish and just had to tell you that you definitely inspired me! I’ve reupholstered the chair in my studio. I’ve been wanting to do it but just couldn’t seem to take the plunge. All that’s left is to blog about this week’s finish. Thanks for hosting TGIFF and for the inspiration to get going on a project I’ve been thinking about!