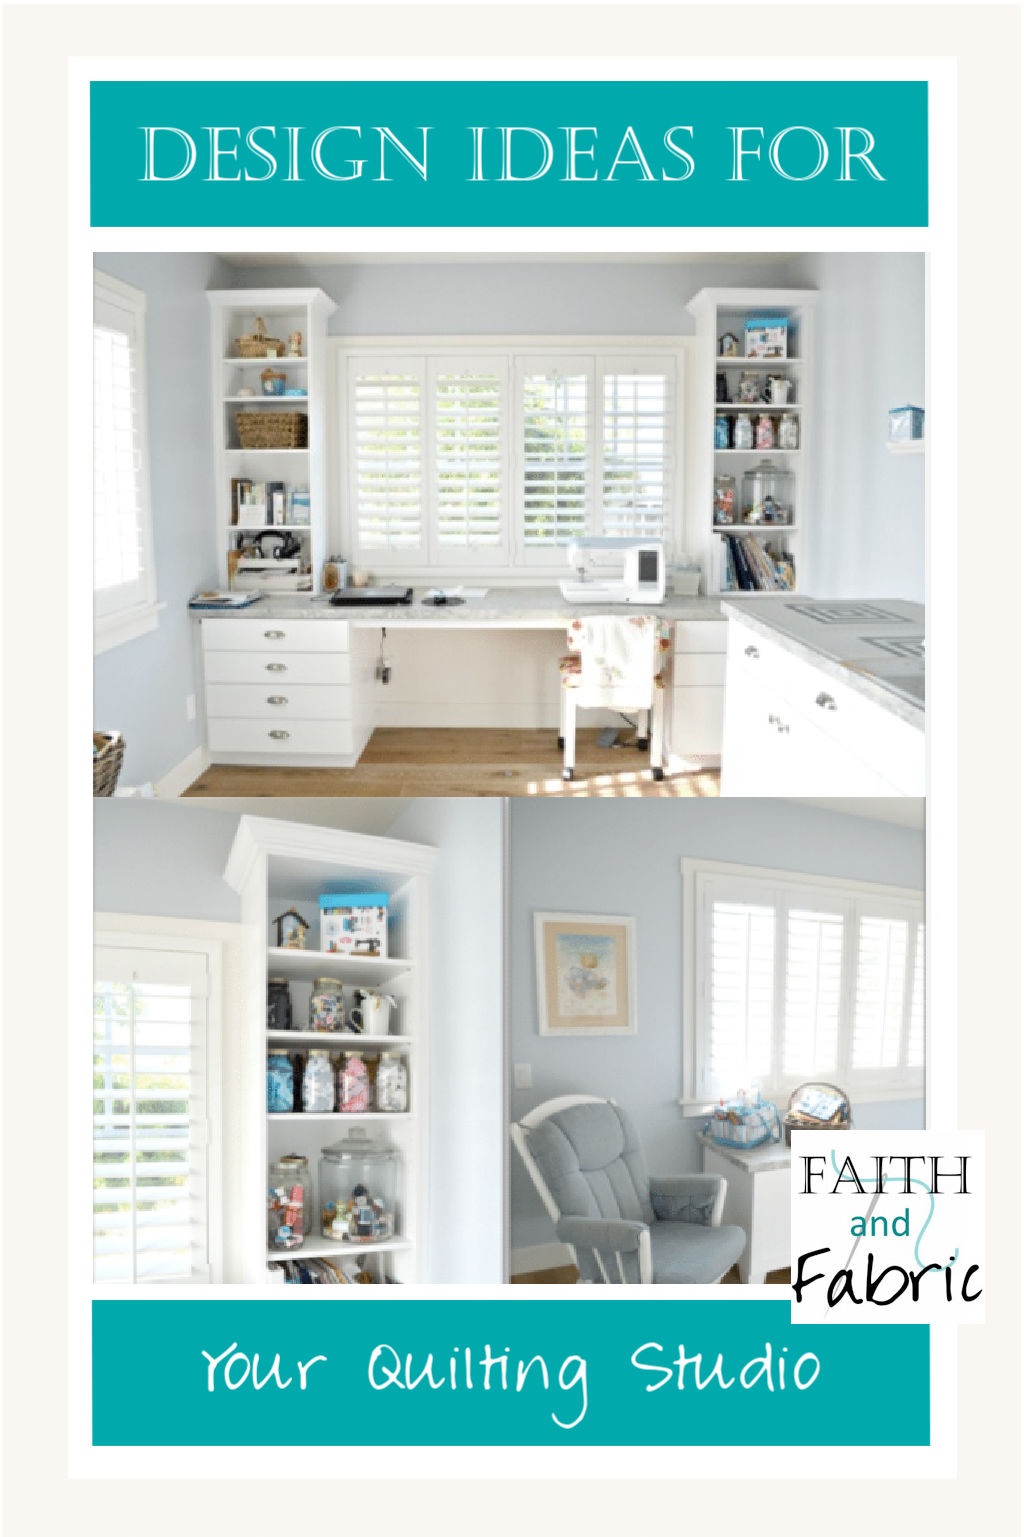
Hello, and welcome to Faith and Fabric! I’m Jen Frost, and am *so* happy to invite you into my newly-redesigned sewing space. Like you, there are so many different ways to reorganize and design your quilting room. We’ll talk through topics like basic quilt room organization, quilt studio design, sewing room layout, and quilting storage tips. I’m looking forward to sharing my remodel with you here today!
Why a Well-Designed Quilt Studio Matters
We’ve long had a guest room that was used several weeks a year by my in-laws when they came to visit, but – the remainder of the time – it served as a not-very-organized (at all) sewing space. My fabric was shoved into a closet, an ironing board sat in the middle of the room, *I* sat on the floor alongside a computer, cutting mat, and my son’s favorite toys…it was a mess. I can’t believe I’m going to share this with you, but we’re all friends, right? Here goes:
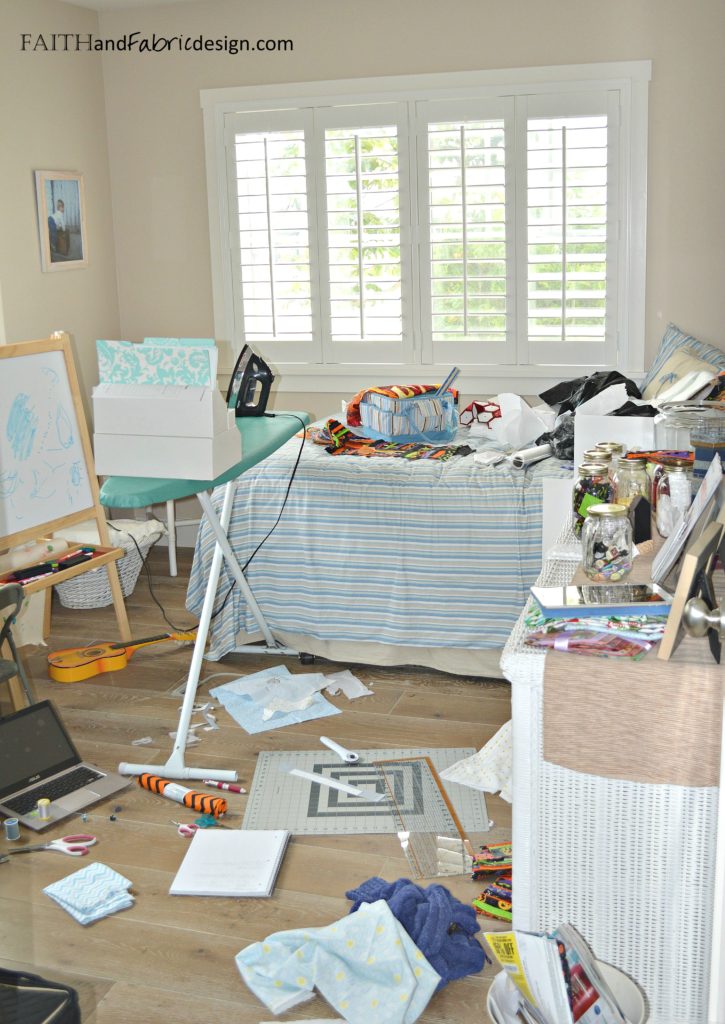
I’m an absolute minimalist and neat freak – though, looking at this space, you’d never know it. The challenge was there was just no where to put anything! The white dresser had the *tiniest* drawers and it was full of mommy and me craft supplies. The bed, by default, became a storage area *and* design wall, which left the floor as a cutting zone. A very small side table held a sewing machine – and that’s about it.
This was definitely not a well-designed quilt studio. While it’s not about the biggest room or the fanciest furniture, it IS about creating a space that supports the way you quilt. My tools were not within reach, the cutting surface was not the right height, and the layout made no sense; I spent as much time hunting for sewing supplies as I did actually sewing. It was time to create a more thoughtful setup which would remove these friction points that were draining my energy and enthusiasm…especially when I was already limited in my time to quilt.
Budget Friendly Ways to Design a Quilt Studio
Designing a quilt studio doesn’t have to mean a big renovation or a big budget. Some of the most effective upgrades to a sewing room are simple, practical changes that make your space work harder for you. Here are some great tips:
- Repurposing Furniture: Use what you already have. Turn a sturdy dining table or desk into a cutting surface or an old dresser into a storage space. You’ll save a lot of money while still giving yourself plenty of room to work. You can also shop garage sales or the Buy Nothing Facebook Group for free (or low cost) items being donated and sold.
- Lighting: Task lighting is one of the most budget-friendly ways to improve a sewing space, especially if natural light is limited. A clip-on or adjustable desk lamp, aimed directly at your machine or cutting area, can reduce eye strain and make detailed work much more enjoyable.
- Sewing Organizational Tools: Likewise, simple organizers for thread, rulers, and tools help keep clutter under control without costing much.
- Mason Jars: You can use jars, like I did, to hold your thread and notions. It’s free if you, like me, have lots of mason jars floating around! Added bonus is the mason jars can be reused again after you use up the thread in them.
- Thread Racks: My mother-in-law swears by her thread rack. Admittedly, mine constantly gets tangled up in the large bell jar that I have them all tossed into.
- Drawer Organizers: Do you have a dresser or drawer space available? Using drawer organizers helps keep all those smaller tools, like seam rippers, tweezers, and needles, contained when drawers are opened or closed.
- Storage Spaces: The saying “a place for everything and everything in its place” is never more true than a quilt room. It’s an easy win when you know where to store your larger items like fabric, rulers, and notions.
Planning Your Sewing Room Layout
My husband is a general contractor, so rebuilding the sewing room into a proper quilt studio was definitely something we could take on. We sat down and sketched out all the ideas I wanted in a sewing space; to do this, I used this awesome book my mother-in-law found, Organizing Solutions for Every Quilter. Some of the key components I wanted in my sewing room were:
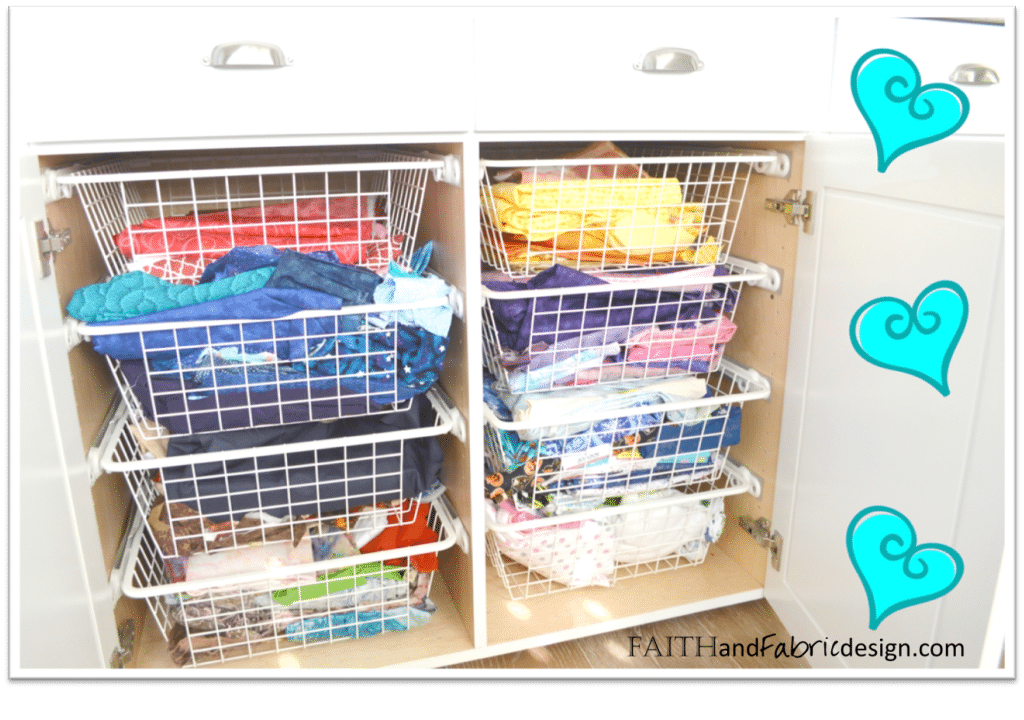
- open wire baskets for fabric (both for ventilation and for easily seeing what I had)
- storage for works in progress
- ironing station
- cutting table
- large design wall
- large desk space/table for both paperwork *and* sewing
- soft muted tones on the walls, counters, and cabinets so the room colors wouldn’t compete with projects
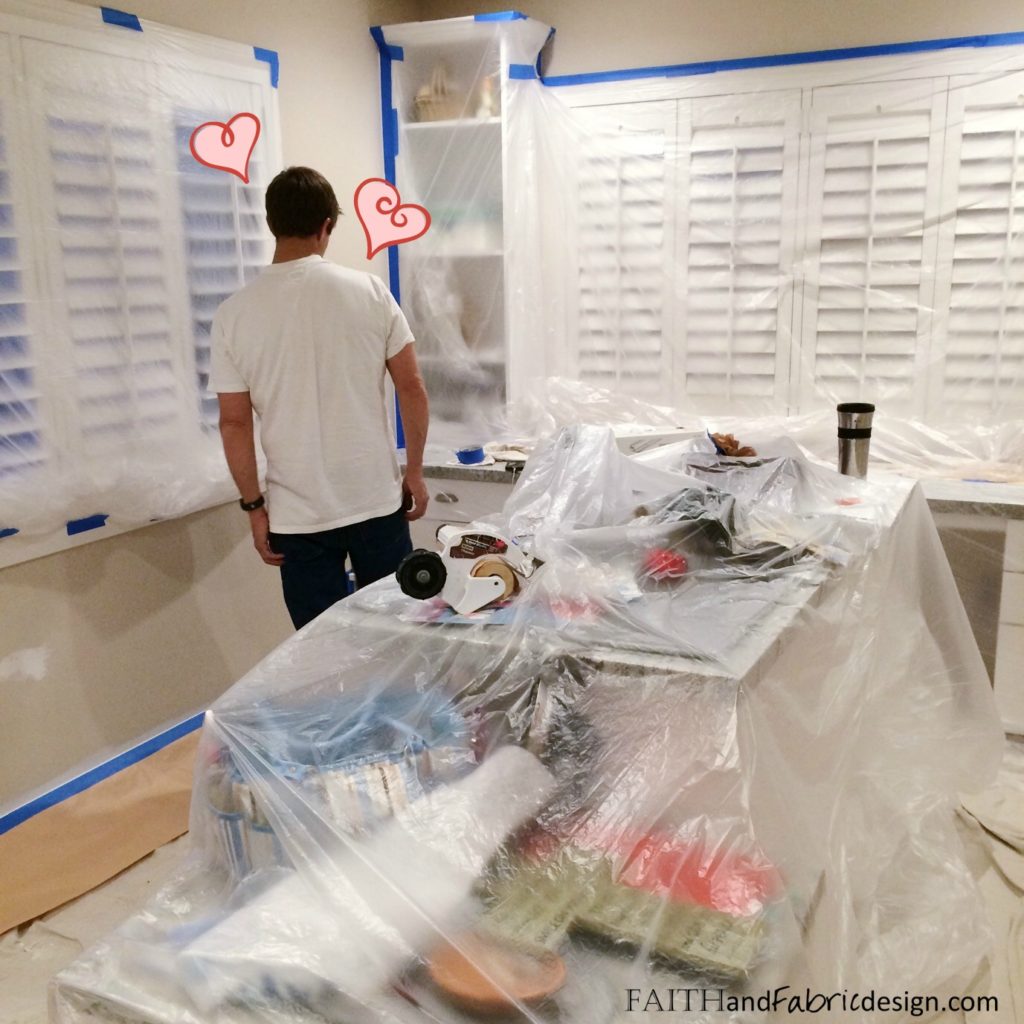
…and then the demo began! There’s just something about a man and tools…
Quilt Room Zones + Storage + Organization
A few months later, the quilting room was done! Let’s take a tour through the sewing space. First, remember the wall the bed was against? It’s now a gorgeous desk and sewing space. There is room for two people to sit side-by-side at the desk, and ceiling height cabinets on each side provide a *ton* of storage space. The chair is on wheels with no arms, which means I can easily slide from side to side when switching from pay-the-bills mode to sewing mode. One other change you’ll notice is the walls went from tan to gray; I love gray. It’s my favorite muted color, and it makes the space feel so clean and bright!
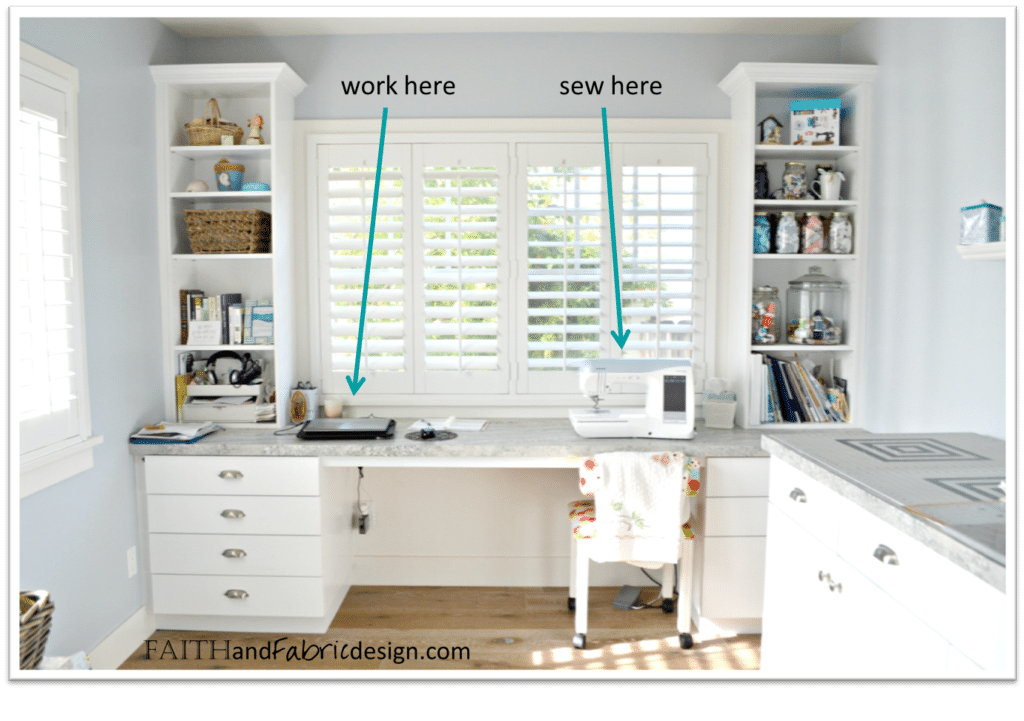
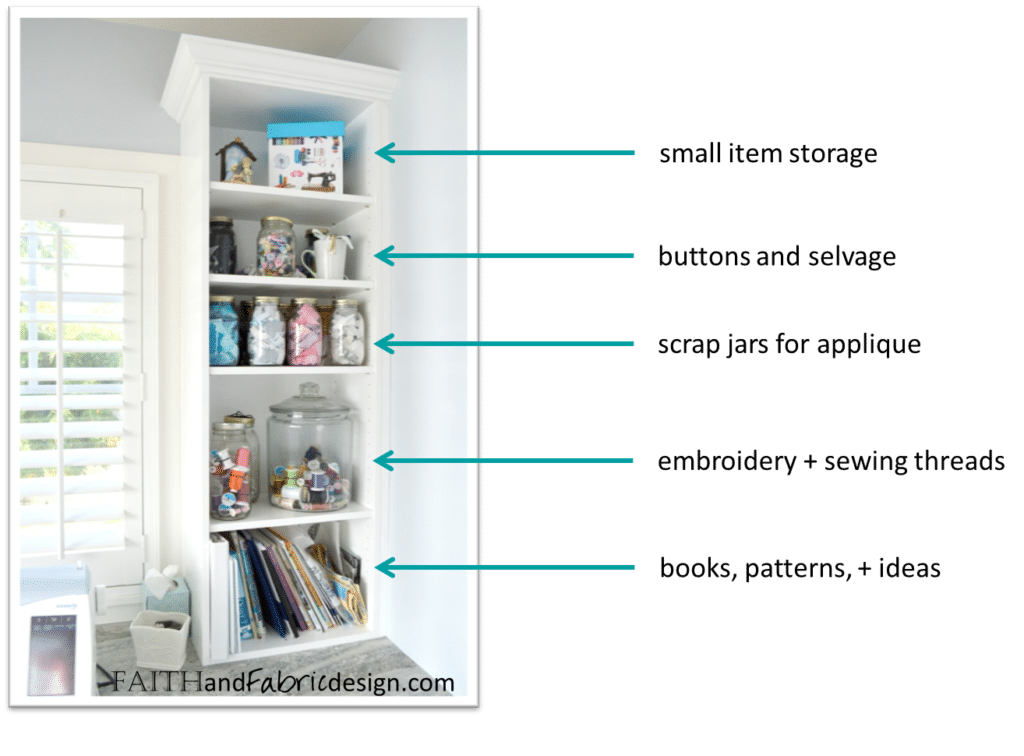
In looking closer at the storage on the sewing side, I wanted to have space for general sewing storage, scraps (as I love applique!), different types of threads (both those that are for embroidery and other specialty threads), and books.
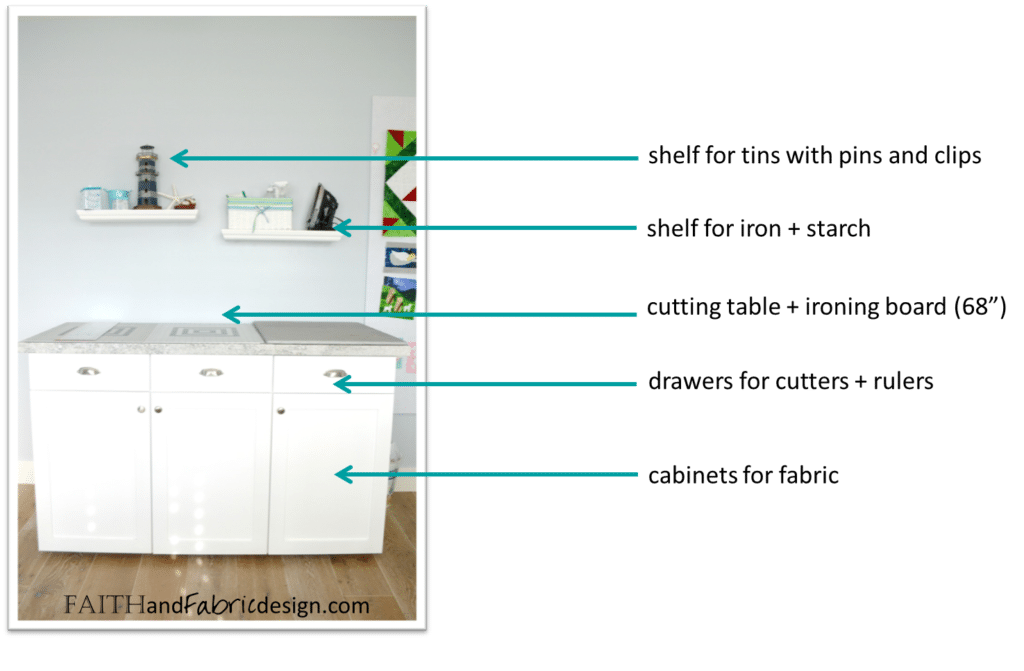
To the right of the sewing space is a large cutting and ironing table. It was designed at just taller than counter height (I like a taller table) and long enough to fit two cutting boards as well as an ironing pad. Again, I didn’t want to waste any space. Two shelves were put above the 62″ cabinet; the first holds pins and my favorite clips, and the second holds a basket for starches and an iron. Just to the right of the cabinet, you can see an almost floor-to-ceiling design wall.
Inside the three cabinets are wire baskets – each of the 12 baskets are organized by fabric color and type, and come completely out so I can remove a basket if needed. (Clearly, I have a thing for blue fabrics!)
On the wall opposite the cutting table – near the “office” side of the desk – is a sitting area. I love (love) reading, so when we redid my son’s room I kept the nursing rocker and moved it into here. I couldn’t bear to part with the chair, and am so thankful it fits so perfectly in my room! I also kept his diaper changing station bag; I remember receiving it from my mom at my shower, and it has special meaning to me. I keep colored pencils, measuring tapes, basting spray, fabric glue, and scissors in it – everything is super handy, and organized.

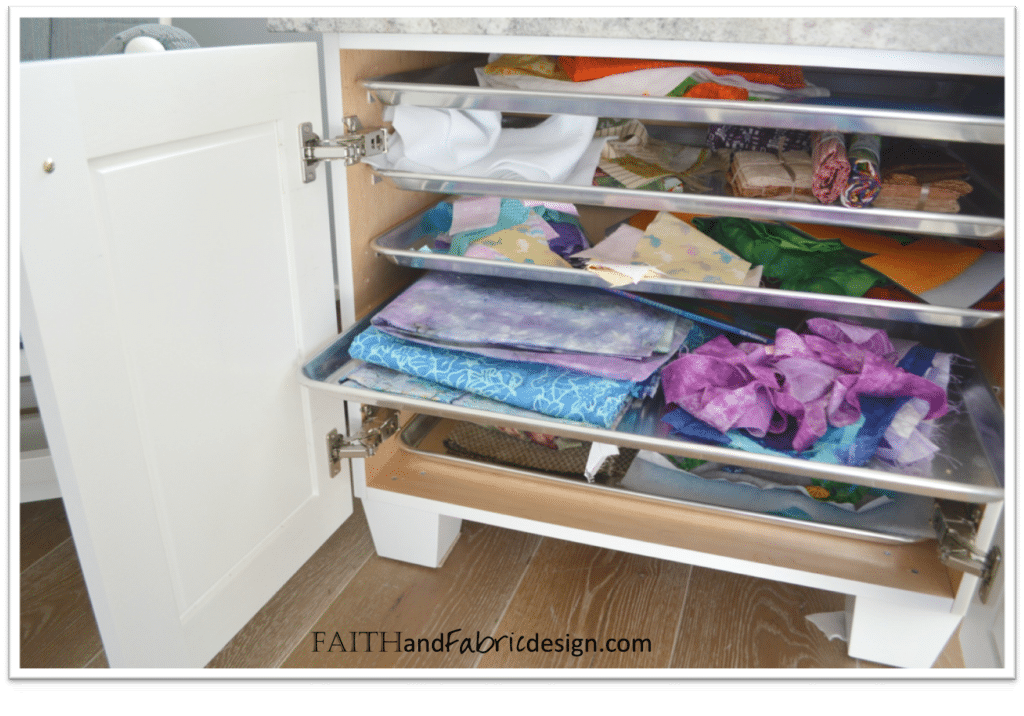
See that cabinet for works in progress? I was tired of them laying around everywhere, but needed a proper way to store them. So, I asked my hubby to design a cabinet that would have rails to hold industrial cookie trays – almost like a bakers rack. Each WIP has it’s own cookie tray that easily pulls out, and I never worry about projects getting lost or ruined.
So there you have it – my quilt studio! I love this room for so many reasons. The overall quilt studio design is more functional; by optimizing the sewing room layout based on the available space and adding sewing room storage, it’s turned into my quiet retreat, my happy place, my creative center. I’d love to hear about your quilting studio – leave a comment with how you organize and design your sewing space!
Frequently Asked Questions about Quilt Spaces
Q: What is a quilt studio?
A: A quilt studio is a dedicated sewing and creative workspace designed for quilting with areas for cutting, piecing, pressing, and storing fabric and tools. It’s a space that lets you be creative with your sewing as it’s a dedicated space. It can be a corner of a room all the way to a two-story barn depending on where you live and what size space you need.
Q: How do I organize a small sewing room?
A: Think vertically and horizontally when organizing your space. Vertical storage like thread racks, pegboards for ruler storage, and stackable labeled bins for fabric maximize space in small sewing rooms. Horizontal storage works best for items you need to spread out or frequently access while sewing. Drawers, whether built into furniture or added as rolling cabinets, are perfect for organizing notions like pins, clips, rulers, marking tools, and machine accessories. Flat storage, such as shallow drawers or under-bed style bins, is especially useful for storing precuts, foundation paper piecing templates, and pattern pieces without folding or creasing them.
Q: What should every sewing room have?
A: A cutting table with cutting mat (here’s the one I use), task lighting, ergonomic chair, storage for tools and supplies, and a layout that supports efficient sewing room workflow.
Such a great space – and how fun that you and your husband were able to design it together.
Andie, thank you! It was a lot of fun to design and work on as a team <3
It looks lovely enjoy being creative 😊
Maureen, thank you! I love having this space so much. I’m playing with moving the table into the center of the room for filming, so we’ll see how that goes!
I love it! Its so bright and airy 🙂
Thanks, Emma – me too! I wanted to keep the space really open, and the white and grays really made that happen.
Fantastic and oh sew peaceful. A little envious here. the desk is gorgeous. i agree a higher table is a must.
Lovely to see your space where you create such lovely things.
Thanks, Raylee! The desk is perfect – I no longer feel so disorganized now that everything has a home.
What an awesome space. Thanks for some of the great ideas.
Thanks, Heidi! It was a great space to create.
What a wonderful bright organized space.
Thanks, Cindy – I’m loving the organization, too.
Awesome room, really like the pullout wire baskets and flat trays. Can you give where to buy them?
Absolutely! The wire baskets are from Ikea, and the flat trays are from Amazon…there’s a link to the trays in the post 🙂
The cookie sheets are a great idea for your WIPs. Love the gray walls too.
Thanks, Tisha! The trays seriously keep the room so much more organized.
wonderful nice clean white bright space … i love the cookie sheet idea
Sherry, they work *so* well! It’s nice to pull one out, work on a project, and then put it away.
The transformation is amazing! Really inspiring for my someday sewing room 🙂
Emily, it was *so* bad before we started! It’s honestly now like my princess room 🙂
I love your room, Faith. I especially like the drawers for the WIP’s. I have them in special carrrying bags that are canvas, because I carry them to quilt studios or quilt guild meetings.
I like your system better. And I am going to check out the book you recommended too. Thanks for sharing, and thanks for inviting me to join this very special blog hop!!
Anne, thank you! It was wonderful to have a peek into everyone’s space and learn a few tips along the way.
Love your new space…but where are your in-laws going to sleep? ?
I just love it when the vision in your mind’s eye comes to reality, don’t you? The creativity will flow now!
Thanks, Sue! We love it, too. They actually stay in our son’s room, and he stays with us!
Love…love… LOVE your sewing room!
Donna, thank you! It’s my happy place for sure.
Where did you buy the cabinet baskets? I’m finding them, but very expensive.
Hi Sandi – do you mean the metal ones in the cabinet? I think I bought them at Ikea.