Welcome to Faith and Fabric’s stop on the Back to School Blog Hop!
It’s been a great two weeks so far, learning along with some of my favorite quilters about fussy cutting techniques, binding joins, y-seam tips, and more. I’m excited to be stop #18 on the tour, and am here to tell you about *my* favorite tip: Spray Basting!
Like all good lessons at school, let’s start with the basics. Spray basting is a wonderful way to create a temporary adhesive layer between your fabric and batting when you create your quilt. Simply spray your basting spray on the wrong side of your fabric, press onto your batting, and voila! – it’s basted. I started spray basting a few years ago when making my Advent Wreath quilt, and it’s something I do now with every single quilt I make. It holds the layers perfectly in place as they are (gently) moved through the neck of my machine, something my pins alone can’t achieve. It’s simple, it’s temporary, it eliminates the need for pins, and it washes out. What could be easier?
Ready to spray baste your first quilt? Awesome! Let’s get started:
- Bring your quilt top, quilt back, and batting outdoors *or* lay down an old sheet on your floors. Spray basting, well, sprays! As you spray right up to the edges of your quilt, you don’t want to get the spray on your carpets or hard wood floors.
- Lay your quilt back right-side down, and lay the batting on top of the wrong side of the quilt back. Gently smooth. Fold the batting back half way, either corner to corner or top to bottom (see image below using our Mary fabric).
- Apply a coat of spray basting to the exposed bottom-side of the batting. Gently roll the sprayed batting onto the fabric, smoothing with your hands as you go.
- Next, move onto the other half. Fold the batting on the lower half of the quilt, and repeat step 3.
- Lay the quilt top wrong-side down on top of the batting. Fold back half the quilt top and spray the batting, then smooth the quilt top onto the batting with your hands. Repeat for the bottom half of the quilt top. (TIP: always spray the batting and not your fabrics, as the loose threads and seam allowances can get bunched up)
- For an added “stick”, press your quilt sandwich. The heat from your iron will not only smooth out any remaining wrinkles, but will set the basting spray.
- You’re done!

Let’s dive into the amount of spray basting needed:
Depending on the type of batting you’re using, the amount of spray basting you’ll need to spray varies. Some fabrics are thicker and just require more – and others seem to suck it right up.
- If using 100% cotton batting, spray lightly over entire area
- If using a cotton blend or wool, spray moderately over entire area
- If using 100% polyester, spray two coats/thicker; the polyester batting can be a bit fussy and not stick quite as well to your fabric
Favorite spray basting brands:
As a spray basting lover, I’ve tried several different brands over the past few years. Here are two of my favorites:
- Sulky KK-2000: this spray baste comes in a small, convenient spray bottle making it perfect for taking to quilting retreats and guild meetings. It comes out in a soft spray with little over-spray, making it great for working in small spaces.
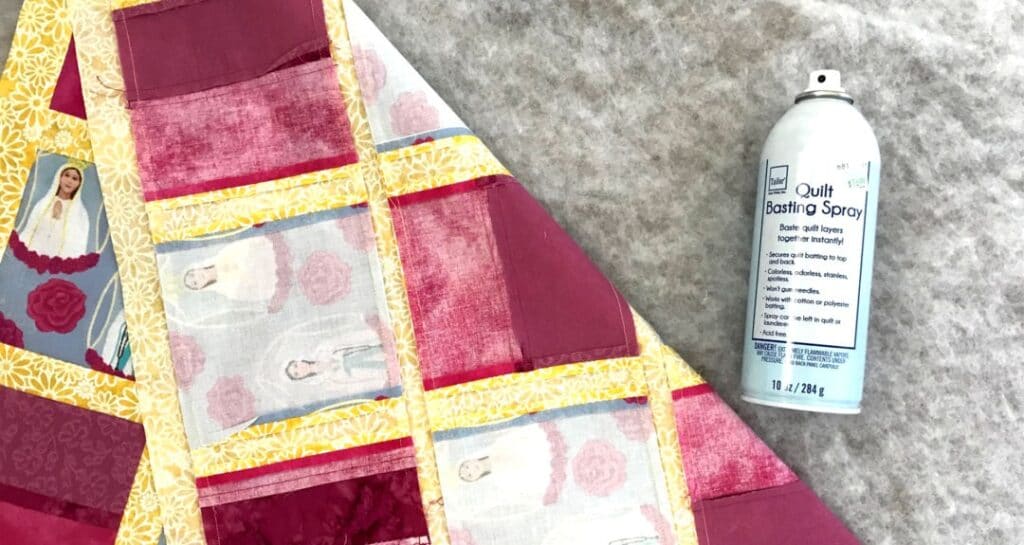
- June Tailor Basting Spray: this is my every-day go-to basting spray! Twice the size of the Sulky spray (and nearly the same price), you get more bang for your buck. As opposed to a liquid spray, the spray generated with June Tailor is fibrous – making it ideal for working with all types of batting. The fibrous spray locks onto the batting, creating the perfect adhesive seal!
Ready for a few more Back to School Tips? Here are a few posts you don’t want to miss!
- Day 1 – September 1 – Sam Hunter: Sewing Long Seams Without Stretching – huntersdesignstudio.com
- Day 2 – September 2 – Susan Arnold – Joining Binding the Easy Way – quiltfabrication.com
- Day 3 – September 3 – Angie Wilson – Fussy cutting tips and techniques – www.gnomeangel.com
- Day 4 – September 4 – Andi Stanfield – No-Mark HST: Let your machine be your guide – truebluequilts.com/blog/
- Day 5 – September 5 – Bobbie Gentili – Say YES to Y-seams – geekybobbin.com
- Day 6 – September 6 – Mel Beach – 5 Reasons to Say Woo Hoo! to School Glue – pieceloveandhappiness.blogspot.com
- Day 7 – September 7 – Laura Piland – 7 Ways to Use a Laser on Your Sewing Machine – www.sliceofpiquilts.com
- Day 8 – September 8 – Suzy Webster – How to solve loops in free motion quilting – www.websterquilt.com
- Day 9 – September 9 – Tara Miller – Accurate Stitch-and-Flip Corners – quiltdistrict.com
- Day 10 – September 10 – Latifah Saafir – Accurate Seams Using Masking Tape! – latifahsaafirstudios.com
- Day 11 – September 11 – Sarah Ruiz – The Magic of Glue Basting – saroy.net
- Day 12 – September 12 – Jen Shaffer – Ways to stop your ruler from slipping while cutting – patternsbyjen.blogspot.com
- Day 13 – September 13 – Cheryl Sleboda – Basics of ruching (a vintage fabric manipulation technique) – muppin.com
- Day 14 – September 14 – Raylee Bielenberg – Choosing quilting designs for your quilt – www.sunflowerstitcheries.com
- Day 15 – September 15 – Jen Strauser – Accurate and Attractive Machine binding – dizzyquilter.com
- Day 16 – September 16 – Jane Davidson – Matching points for all types of intersections – quiltjane.com
- Day 17 – September 17 – Teresa Coates – Starch and starch alternatives – teresacoates.com
- Day 18 – September 18 – Jen Frost – Benefits of spray basting – faithandfabricdesign.com
- Day 19 – September 19 – Sandra Starley – Getting started with Hand Quilting – utahquiltappraiser.blogspot.com
- Day 20 – September 20 – Karen Platt – Drunkard’s Path Made Easy – karenplatt.co.uk/blog/
- Day 21 – September 21 – Kris Driessen – All Kinds of Square (in a Square) – scrapdash.com
- Day 22 – September 22 – Sarah Goer – Planned Improv Piecing – sarahgoerquilts.com
- Day 23 – September 23 – Kathy Bruckman – Organizing kits for on-the-go sewing – kathyskwiltsandmore.blogspot.com
- Day 24 – September 24 – Cheryl Daines Brown – The Secret to Flat Quilt Tops: Borders – quilterchic.com
- Day 25 – September 25 – Cherry Guidry – Pre-assembling fusible applique – cherryblossomsquilting.com
- Day 26 – September 26 – Laura Chaney – Getting started with English Paper Piecing – prairiesewnstudios.com
- Day 27 – September 27 – Ebony Love – Cutting Bias Strips from a Rectangle – lovebugstudios.com
- Day 28 – September 28 – Tammy Silvers – Working with heavier weight threads in your machine – tamarinis.typepad.com
- Day 29 – September 29 – Kathy Nutley – Create a perfect facing or frame with 90 degree angles – quiltingsbykathy.com
- Day 30 – September 3 – Joanne Harris – Using Leaders and Enders – quiltsbyjoanne.blogspot.com
[…] Jen Frost – Spray Baste your Quilt […]